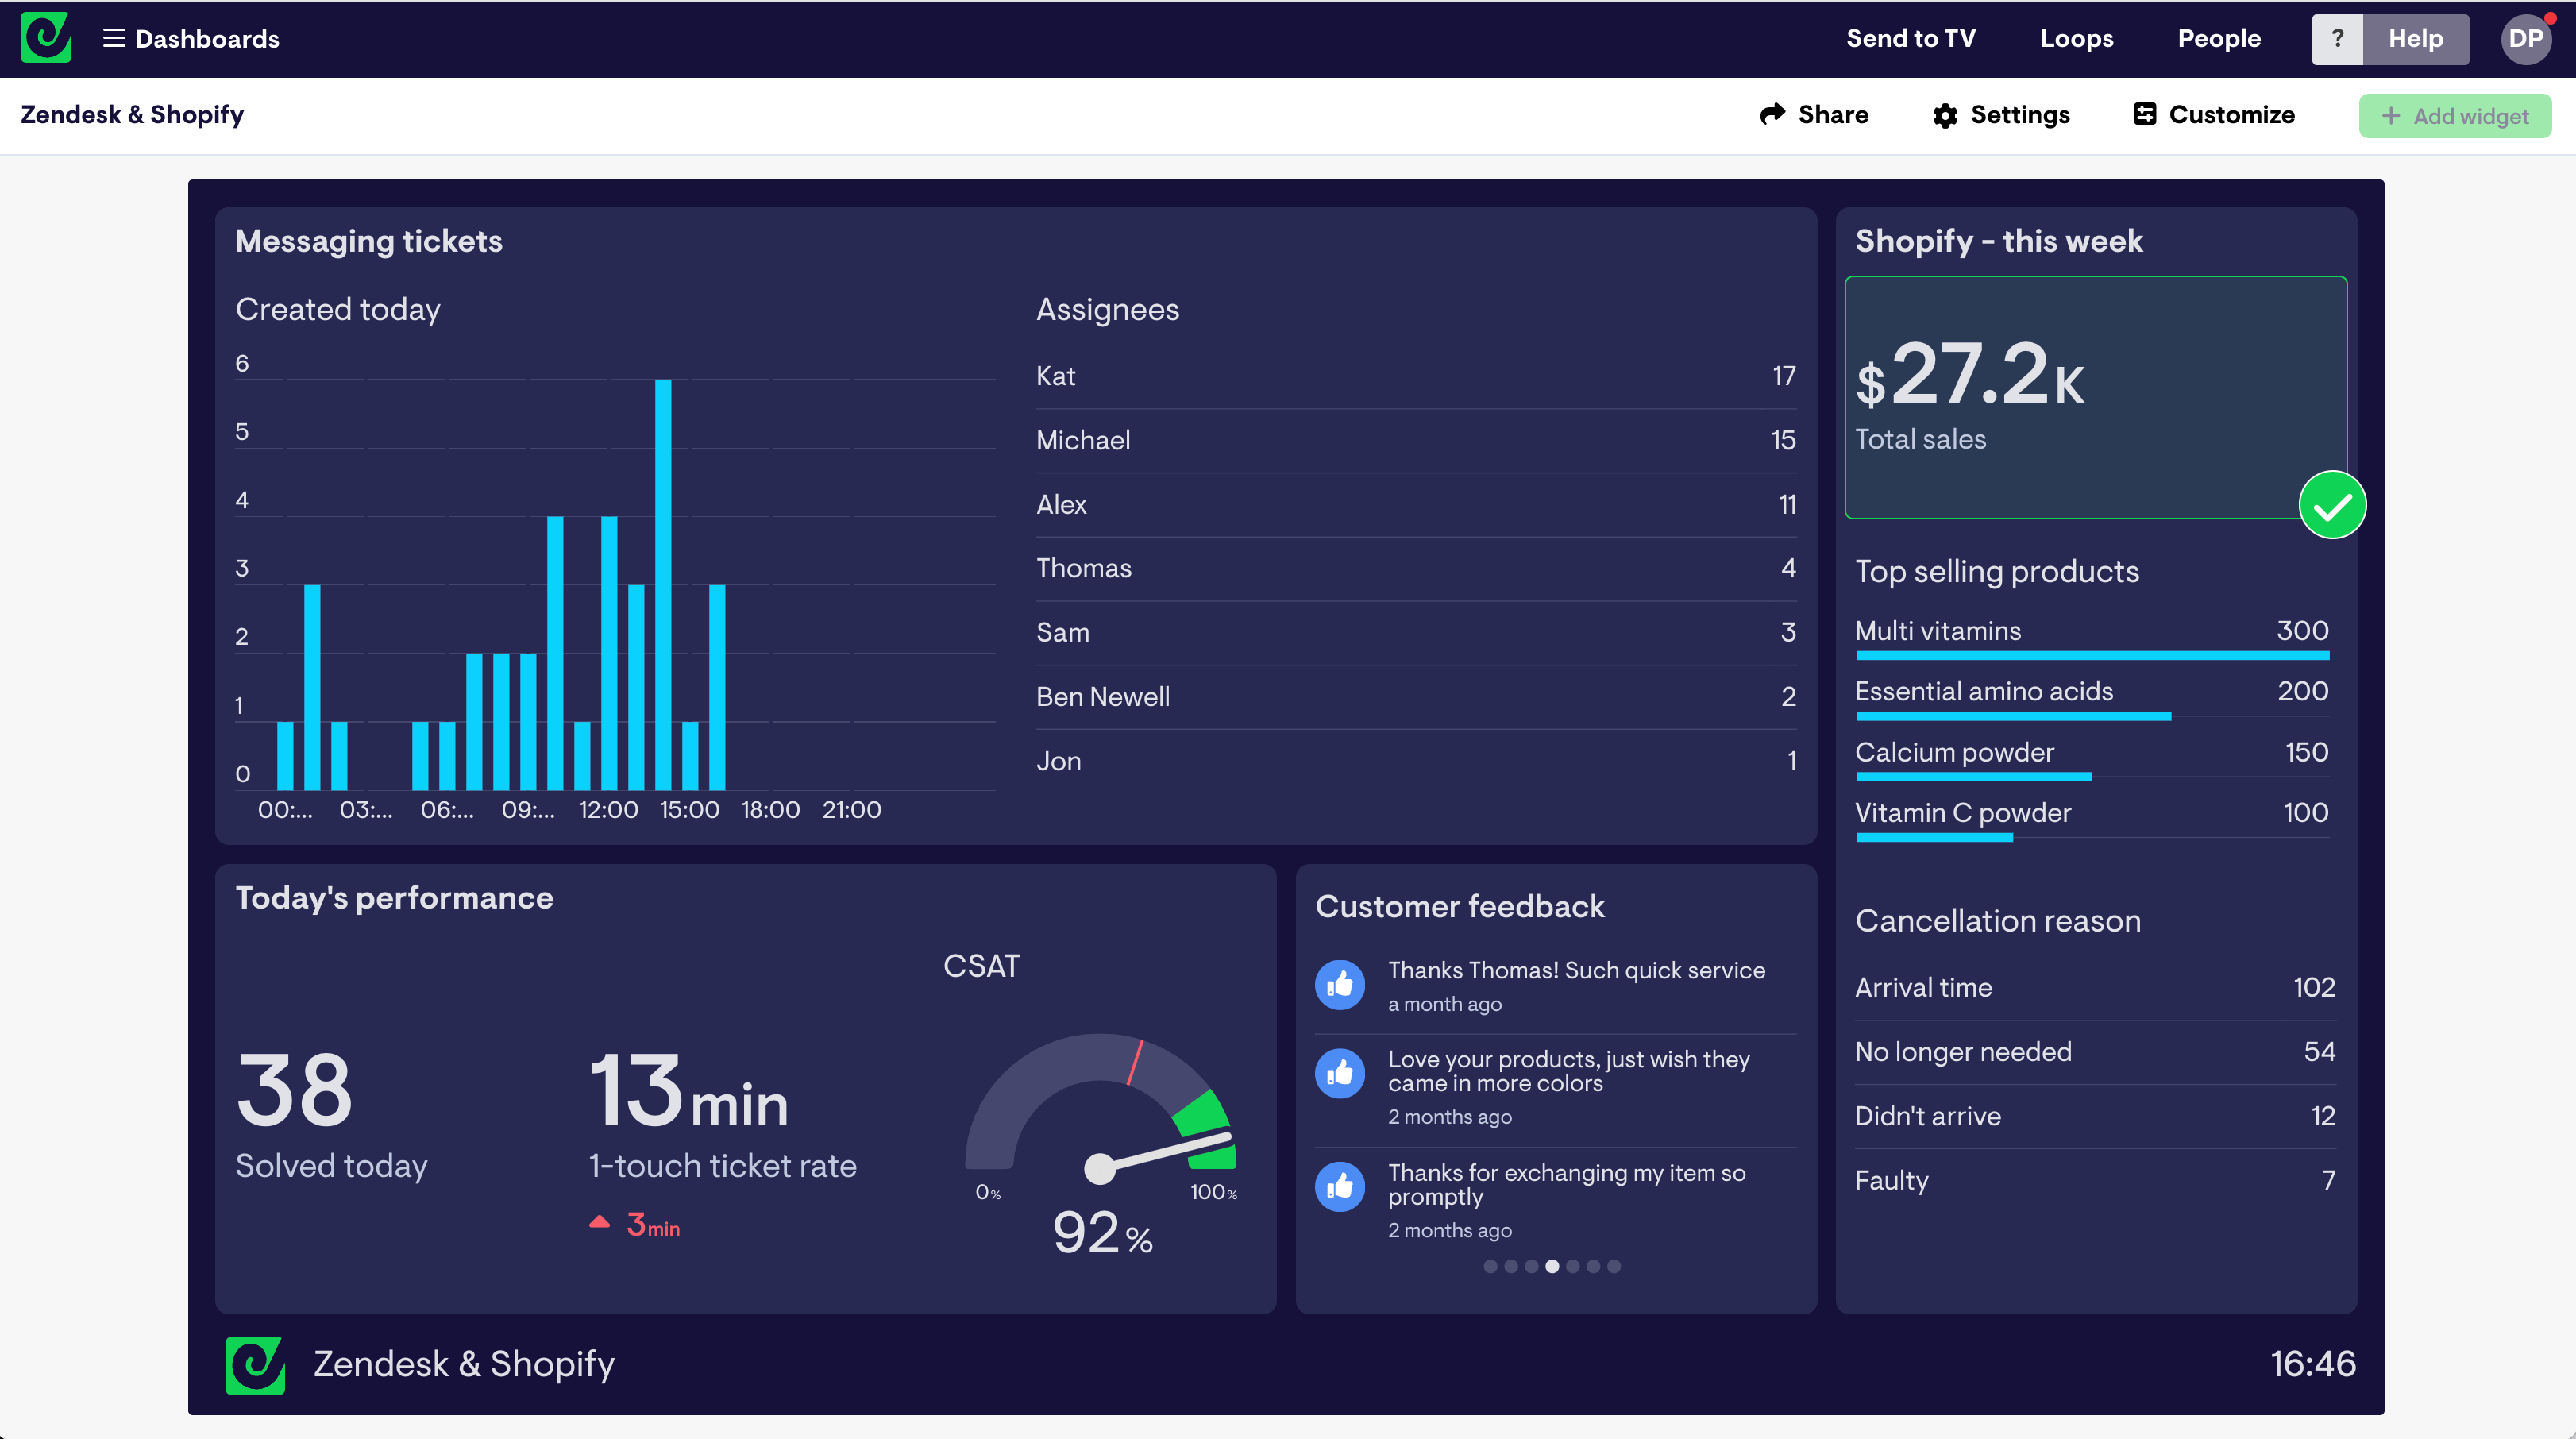
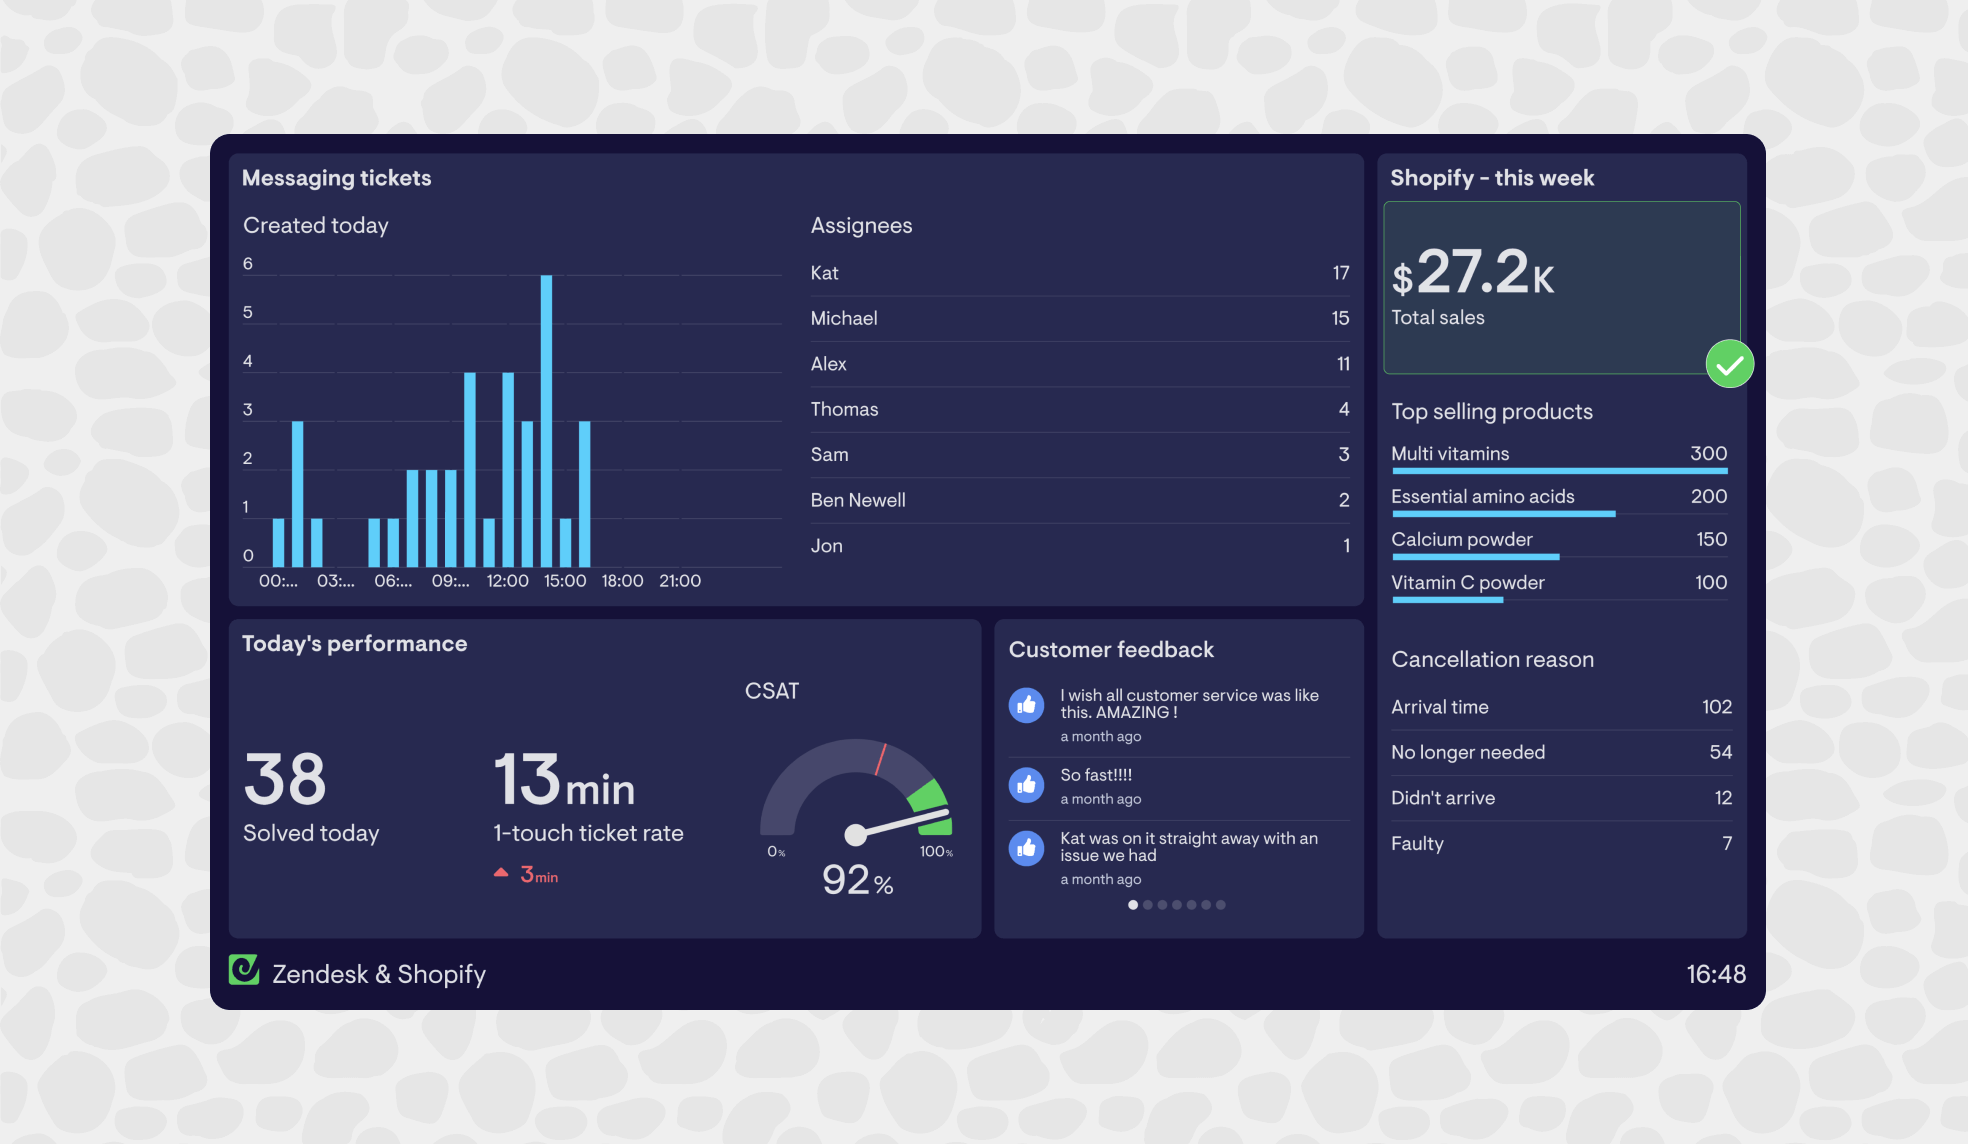
If you're an ecommerce business who also uses Zendesk to manage your customer support function, then you may have thought about different ways you can integrate the two platforms.
And you wouldn’t be alone. The more ways you can find to integrate and streamline these two platforms, the more time you are going to save as a business.
In this article we explore how you can build real-time KPI dashboards that display data from Shopify and Zendesk, so you can stay on top of your customer experience.
Shopify for Zendesk
Before we talk about alternative ways to integrate Shopify and Zendesk data for reporting, we should look at the default option used by many businesses, Zendesk’s official Shopify for Zendesk integration.
This is a great solution if you want to bring the two platforms together – particularly if you want to set up Zendesk Chat for your Shopify Store.
Then, if you want to report on your customer support performance, you can use Zendesk Explore to conduct your reporting as you normally would.
However, many businesses will want to go further with their reporting – keeping track of both Zendesk and Shopify metrics in real-time. For this, we’ll need Geckoboard.
Real-time dashboards for Shopify and Zendesk
If you’re a fast-moving, data-driven team, then it’s likely you want to keep track of your performance KPIs in real time.
Not only will you want to track important support metrics like First Response Time, and Average Resolution Time. It's likely you’ll also want to keep track of what’s happening with Shopify metrics like Cancellation Reasons and Top selling products.
For this you will need a KPI dashboard that visualizes data from both Shopify and Zendesk in real-time.
Not only does Geckoboard integrate with both these platforms (as well as 90+ other data sources) it’s also easy to set up and use, meaning you can build your first dashboard in just a few minutes.
It’s also optimized for TV display, so if your team works in an office or contact center, you can display your dashboard on the wall, where everyone can keep track of it, at a glance.
That means if anything happens suddenly – such as a build up of customer tickets, you can react fast.
How to build a Shopify and Zendesk dashboard
Step 1: Sign up to Geckoboard
Sign up with Geckoboard for a 14-day free trial – no credit details required.
Sign up to Geckoboard for free
Step 2: Connect your Zendesk account
To start, click ‘add widget’ and select either Zendesk Sell, Zendesk Support, Zendesk talk or Zendesk Chat.
Choose any of the widget options to get started, then follow the instructions to connect your Zendesk account.
Step 3: Create a widget
Now you’ve connected your data, you can start using Geckoboard to build widgets. (A widget is just a name for a data visualization: such as a bar chart, a leaderboard, a gauge or a number.)
You can make widgets more meaningful by adding goals and status indicators. This helps anyone looking at the dashboard to understand whether a metric is good or bad, and if they need to take further action.
Step 4: Connect Shopify
Add another widget and this time select Shopify before connecting your Shopify account. It may take a few minutes to import you data, but once you're done you can build another widget visualizing real-time Shopify data.
Step 5: Build up your dashboard by adding more widgets
Continue adding widgets to build up your dashboard, visualizing metrics from both Zendesk and Shopify.

Now your dashboard is complete it will auto-refresh, so it’s always up to date.
You can share your dashboard in multiple ways. Our Send to TV feature makes it easy to pair your dashboard with a TV device and manage your loops of dashboards remotely.
You can also create a sharing link for your dashboard or set up automated reports for email and Slack.

